Workflow to add lip-sync to character scenes in generative video projects.
Storytelling, like world-building, requires various types of scenes so viewers can relate to the world you are trying to convey. Narrative and sound-effect-synced videos work great for visual storytelling, and lip-synced layers add a whole new dimension to the story by allowing dialog and point-of-view scenes, making the viewer relate to the characters.
You can now add lip-sync to video layers in scenes wherever applicable in SamsarOne Studio, with a simple workflow that we describe below.
Add LipSync Workflow
You can add lip-sync to any generative video if the speaker is the main focus and their lips and mouth remain clearly visible throughout the entire speech. In SamsarOne, we refer to these videos as "Character" type videos. The studio by default uses LatentSync, a state-of-the-art (SoTA) lip-sync model hosted via Fal to add lip-sync to our workflow.
The workflow:
- Create Speaker Image
- Animate Speaker Image to Video.
- Add Speech Layer to Scene
- Lip-sync Scene to Speech Layer
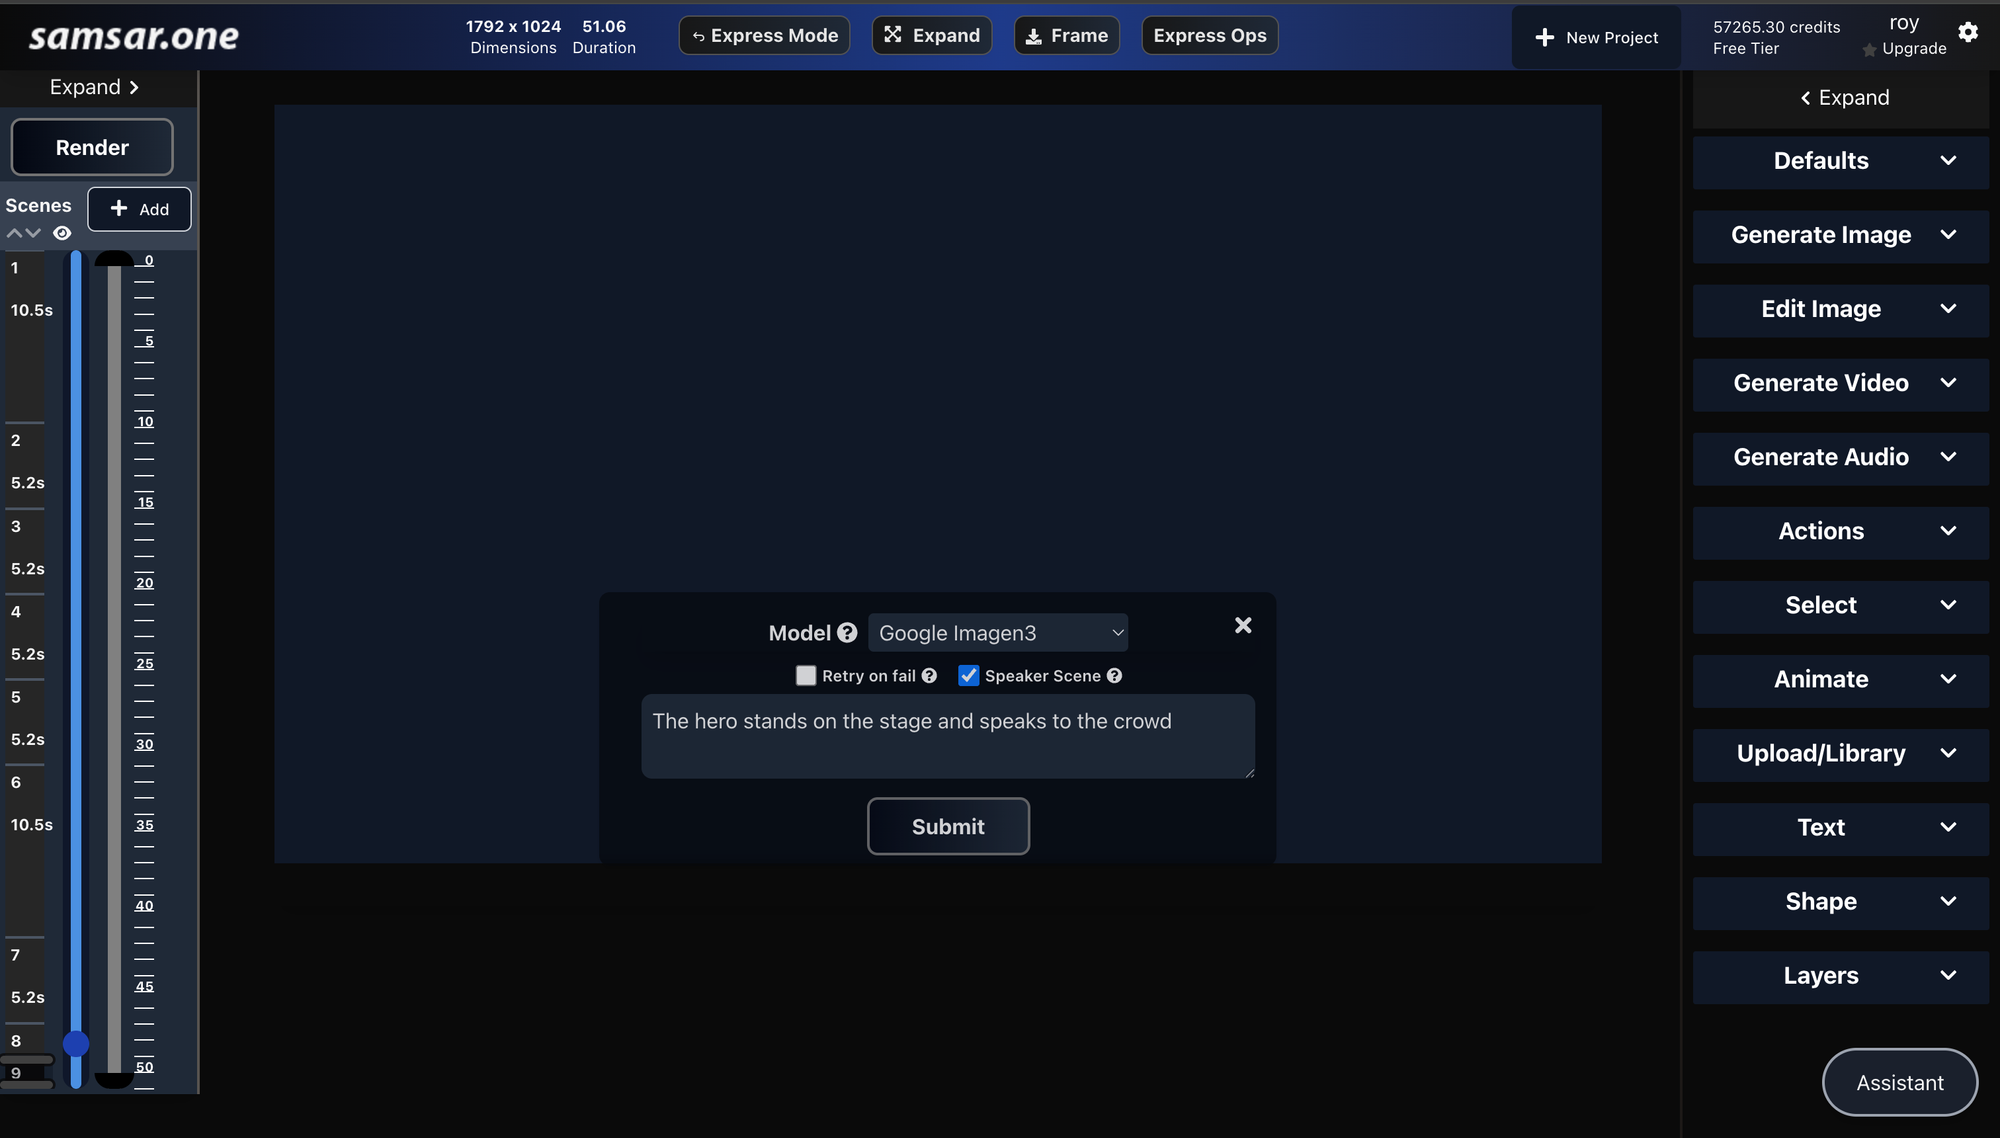
Like any video scene, we start by creating the starting frame image for the scene. To create a character image, just check the "Character" checkbox while typing an image prompt. If you already have a custom theme defined, any character you reference will automatically incorporate that theme.
Once you have the character image, animate the image using an img-to-vid model from the Video Tab in the Right toolbar. We recommend using Kling, Runway, or Luma for higher quality and longer duration videos which can be easily lip-synced in the next stage.
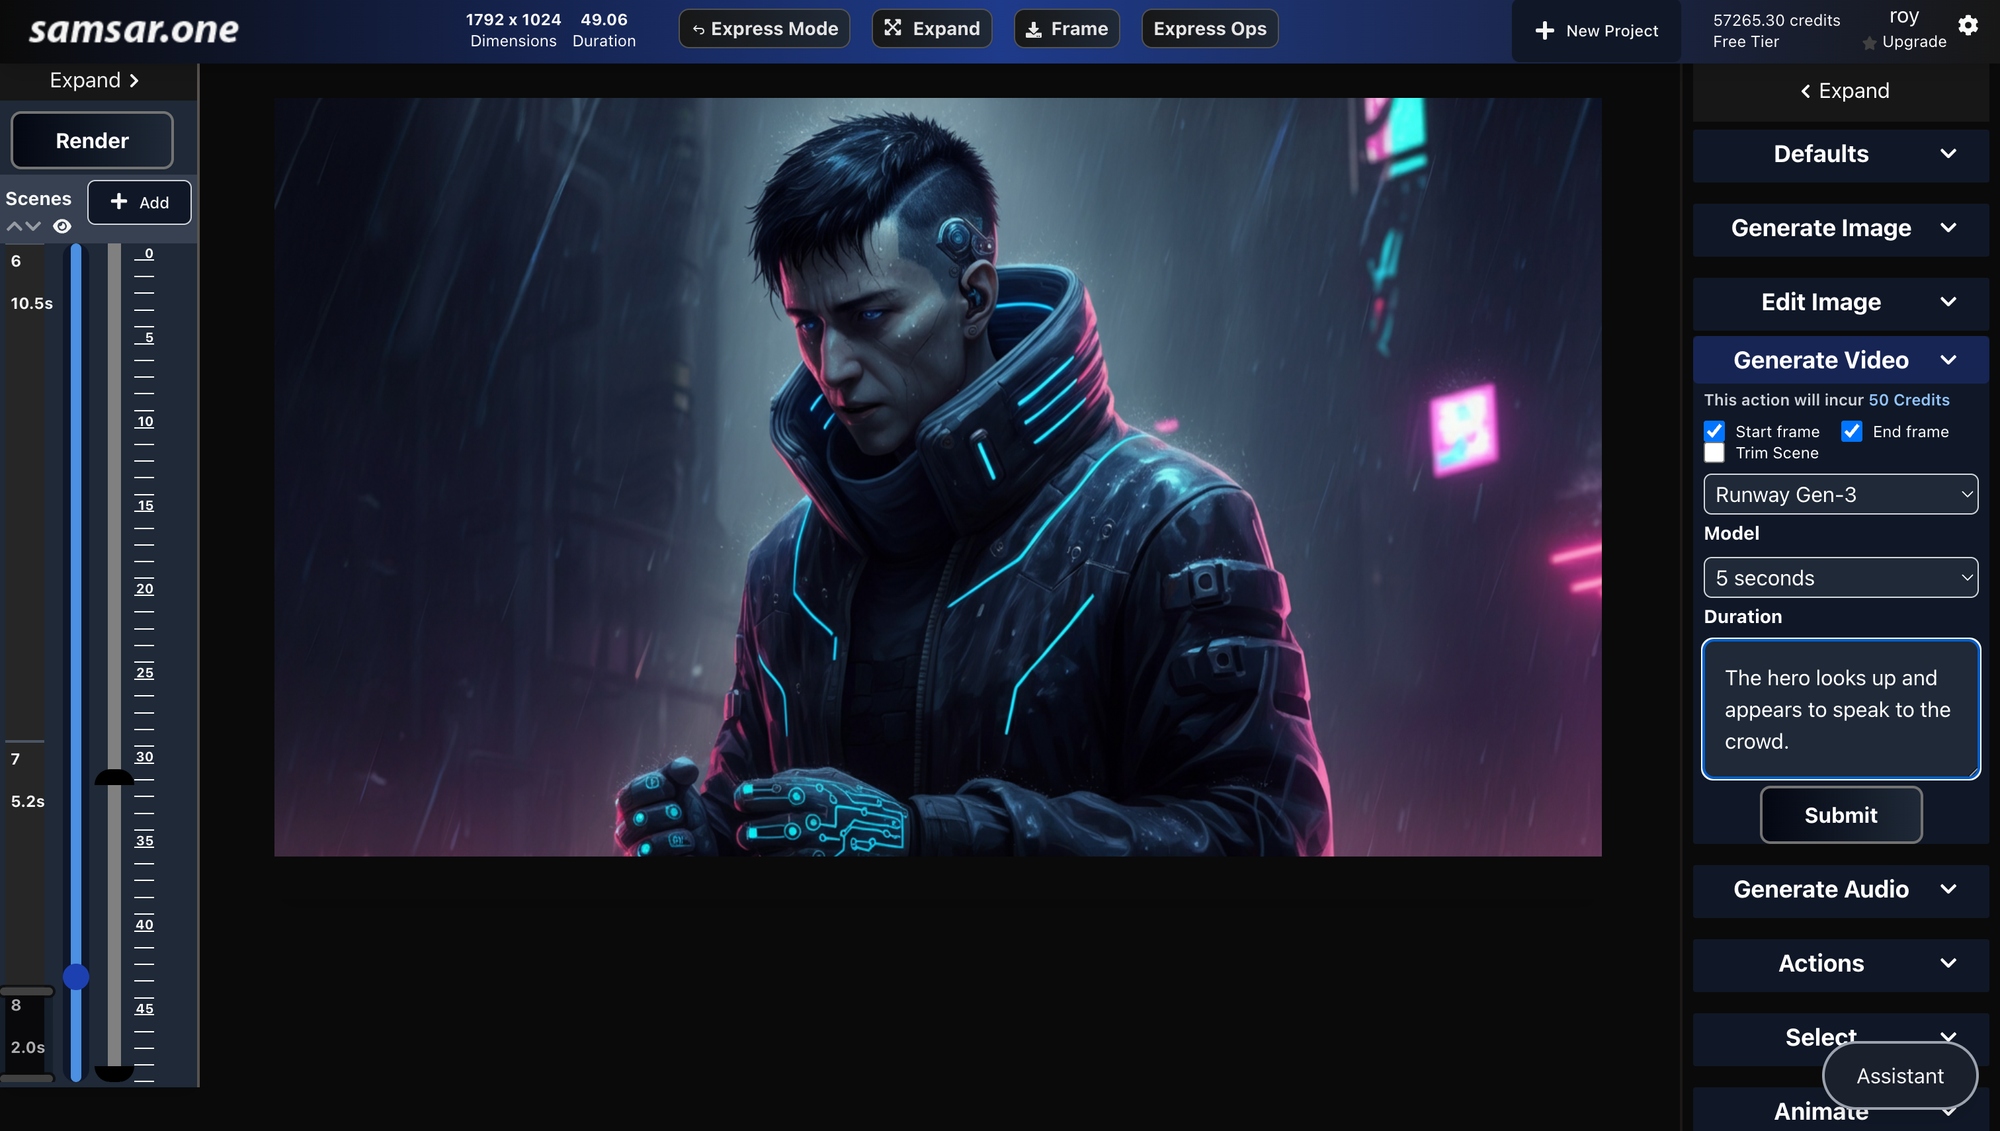
After you have the base AI video you will see the Base AI Video pill next to the label.
Go to the Generate Video tab again to see if you can lip-sync this layer yet. If you do not have a speech layer corresponding you will see a message asking to create a speech layer to generate LipSync.
To create a speech layer, Use the following workflow in the Right toolbar-
1. Generate Audio
2. Choose Speech in the Tab.
3. Choose Speaker.
4. Type prompt text.
5. Submit and wait for speech generation to complete.
6. Preview the speech and add to your project at a start timestamp.
Ensure that the speech layer is completely contained within the scene which you are trying to lip-sync. If you have already selected the scene, the speech start time defaults to the start time of the scene.
Now that your scene has a speech layer within its bounds and the video clip contains a POV representation of a speaker, you'll automatically see an Add Lip Sync button in the Generate Video tab in the right toolbar.
Click on Render Lip Sync button and wait for Lip-Sync video render to finish.
Once you have the lip-synced video, you'll see the LipSync pill on top of the video in the frame. Simply render to have the lip-synced layer added to your project.
Once you have added lip-sync to your project, the corresponding speech layer is "Locked" to the visual layer—i.e., you can no longer drag it to re-align it. You can see which speech icons are locked. To undo the lip-sync simply delete the layer at the top of the layer or in the Generate Video panel to get back to the base AI video layer.
After you've added lip-sync to your video, hit render to publish your video. By default, the entire scene will be re-created with lip-sync added only to the speech parts. This might leave the remaining part of the scene as is.
That's it—you now have your lip-synced scene for the character. Connect it with narrative, sound-effect, or base generative video scenes, or even plain image scenes with canvas animations, to create your movie. Hit render when finished. You can also check "Notify via Email" in your settings if you don't wanna wait for the render to finish and want to be notified once your video project completes.
Head over to the Studio app to give it a try.
Users with verified email get 100 free credits. When signing-up for premium membership, use code CREATORONE for a 50% discount off first month.
Follow us on X or Threads for latest news and updates.
Finally, check out the gallery for some inspiration here.